Firstly, a crucial word of caution: Batteries, particularly those lithium-ion packs powering your electric scooters, are not to be trifled with as they are highly sensitive, and improper handling can easily lead to fires. Sometimes, a single wrong connection is all it takes. So, if there's an opportunity to purchase a new charger, it's unquestionably the safer route. Chargers are relatively cheap, and using the right one saves you a whole lot of trouble.
With that essential piece of advice out of the way, let's address the reality you might be facing. It's possible that a replacement charger simply isn't available. Perhaps you're dealing with an older scooter model for which chargers are no longer available, or perhaps you've scored a second-hand gem, but it came without the charger. Or, let's face it, maybe you've just misplaced or damaged the original one. Whatever the reason, you're here, possibly in need of a makeshift charging solution.
In such cases, exploring alternative charging methods might seem justifiable.
This task isn't overly complex, but it’s certainly not a walk in the park either. It's intricate and demands your full attention to every electrical connection you make. A single incorrect connection could lead to a short circuit, which at best could kill your battery, and at worst, turn your scooter into a fireball. Also, keep in mind that trying out these methods will void any warranty on your scooter.
Our guide outlines some relatively safe ways to charge your electric scooter without the original charger. If you're new to this and find terms like 'voltage' and 'current' unfamiliar, don't worry—this is the perfect chance to learn. We'll not only walk you through the entire process but also explain the underlying science and clarify key terms to boost your understanding. However, a word to the wise: if you're not entirely confident in your electronic skills, it's better to avoid these DIY methods.
Safety first, always.
Essential safety measures before charging an electric scooter without a charger
These might seem like no-brainers, but they're vital enough to deserve a mention.
Power off, safety on: Keep everything unplugged from your power source while you're playing electrician. You don't want any surprises.
Safety gear: Goggles and gloves are your armor against the quirks of electricity
Tidy workspace, safe workspace: Keep your charging arena clean, spacious, and as far from anything flammable as possible.
Tool time: Gather all the tools you might need. Some that you shouldn't miss include color-coded wires, screwdrivers, pliers, and electrical tape.
Manual to the rescue: If you have the user manual for your scooter, keep it close. It's your go-to guide for the scooter's wiring setup and other technical specifics you might not be familiar with.
Fire safety at the ready: Hope for the best; prepare for the worst. Have a fire extinguisher on standby. A standard ABC or BC dry chemical extinguisher should do the trick.
Battery monitoring: Once you start charging, don't just walk away. Keep a vigilant eye on the battery. If it starts heating up abnormally, swelling, or emitting any gases, disconnect it immediately.
Understanding charging systems, batteries and terminology used
Let's ease into the basics of charging systems and electric scooter batteries and clarify some of those terms you might see floating around.
Breaking down the key terms:
Let's simplify the concepts of Voltage (V), Amperage (A), and Power (Watts) using an easy-to-understand analogy.
Imagine water flowing through a hose to help visualize these electrical concepts more tangibly. To get water flowing in the hose, you need two things: the water itself and the pressure to push it through the system. In this analogy, the water symbolizes our electrical system, and the tap being turned on is like the wall socket being switched on.
Voltage/Volts (V): is like the water pressure in the hose, driving the water through. In electricity, it's the force driving electric charge through a circuit. Higher voltage means more electrical charge is pushed through, just as higher water pressure pushes more water through the hose.
Current (Amps): is comparable to the flow rate of water in the hose. It shows how much electric charge is flowing through the circuit. A higher flow rate of water (more water per second) is like a higher current, meaning more electricity is flowing through.
Power (Watts): Power combines water pressure (voltage) and flow rate (current) to indicate how much work can be done at any given moment. In electrical terms, power (measured in watts) is voltage multiplied by current, indicating the work capacity of an electrical device.
Power (Watts) = Current (A) * Voltage (V)
The higher the power, the more work can be done by an electrical device, like producing brighter light or driving a motor faster.
Polarity - Don't Flip It: Polarity in an electrical system refers to the direction in which current flows from one point to another. Imagine it as water flowing from the tap, where there’s high pressure, through the hose, to a destination with lower pressure. Similarly, electric currents travel from a point of higher electric potential (positive) to one of lower potential (negative).
Just like a battery has positive (+) and negative (-) terminals, power supplies also have positive and ground (negative terminal of the circuit) terminals. For correct polarity, you need to connect the positive battery terminal to the positive end of the circuit and the negative terminal to the negative end.
Mixing these up - that is, connecting the positive terminal to the negative end of the circuit and vice versa - is like trying to force water to flow back from the hose to the tap, which just doesn’t work. In electricity, such incorrect polarity can seriously damage electrical components or cause short circuits.
What happens if you charge an electric scooter battery with the wrong voltage and current?
Every electric scooter battery has its ideal charging voltage and current. Stray away from these golden numbers, especially on the higher side, and you're asking for trouble.
Chargers are typically designed with an output voltage slightly higher than the battery's nominal voltage (the voltage usually indicated on the battery or in the manual) to ensure effective charging. The charging voltage generally matches or is slightly above the battery's full (or maximum) voltage but not to a great extent to prevent overcharging. That's the reason why you often find a battery with a nominal voltage of 36V, but the accompanying charger is rated at 42V, aligning with the battery's full (or maximum) voltage.
Here's a quick note: Nominal voltage represents the average voltage a battery provides during use; it's what you can typically expect when the battery is in operation. Full (or maximum) voltage, in contrast, is the peak energy level the battery achieves when fully charged and not being used. However, this high voltage doesn't last, as it starts to decrease once you start using the battery. The battery's full voltage is normally greater than the Nominal voltage.
Consequences of using the incorrect voltage
- Exceeding recommended voltage: At best, it works, but you risk overcharging the battery. In a mid-scenario scenario, the Battery Management System (BMS) might step in, potentially resulting in the battery being soft or hard bricked as a protection measure, leaving you with a non-functional battery that is hopefully salvageable. In the worst-case scenario, you could stress the battery to the point of damage or even cause a fire.
- Charging at nominal voltage only: Doing this might result in getting only around 50% charge.
- Below the required voltage: If the voltage is too low, the best-case scenario is that the battery will still charge, but the increase in charge will be minimal and hardly usable. On the other hand, a more common scenario is that the battery won’t charge at all.
How to get the right charging voltage for your electric scooter battery?
When figuring out the correct charging voltage for your electric scooter battery, don't just assume that if the nominal voltage of the battery is 36V, the charging voltage should also be 36V. As previously discussed, the charging voltage is usually higher than the nominal voltage.
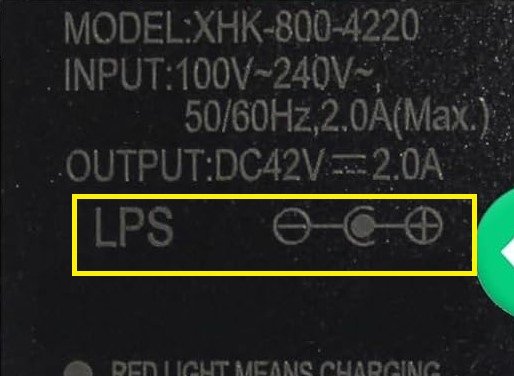
To pinpoint the right voltage for your battery, always refer to the user manual or check the specification sticker on the battery. Look for details like "Max. Input Voltage (VDC)", "Max. Charging Voltage", or information under "Power Requirement". This will provide you with the exact recommended charging voltage.
But let's say you're in a pickle and don't have that info at hand.
If you know the nominal voltage of the battery – that voltage that's usually plastered all over the battery – you can use this to estimate the voltage for your charger. Here’s a quick guide:
- If your electric scooter's battery nominal voltage is 36V, then the required charger voltage is generally around 42V.
- For a 48V battery, a 54.6V charger is typically needed.
- A 52V battery usually pairs with a 58.8V charger.
- For a 60V battery, you'd likely need a 67.2V charger.
- And for a 72V battery, an 84V charger is generally used.
This guideline applies to most lithium-ion battery packs.
Current consideration
As for current, or amperage, unlike voltage, it’s a bit more forgiving. Your electric scooter will only use what it needs. So, if your charger's serving up more amperage, your battery's just going to shrug and take its usual portion. Therefore, that means the power supply’s amperage should be equal to or greater than what the device requires. However, it's crucial not to use a charger with excessively high amperage, above the limit set for your scooter. Such high amperage could cause the Battery Management System (BMS) of the battery to overheat, which may lead to potential damage to the cells
As for the minimum charging current, it's ideal for it to be within the range of 15 to 25% of the battery's AH capacity. If the current provided is lower than this, it could result in a slower charging process, or, in some cases, the charger might not be effective at all.
In summary, when selecting power supplies or chargers for your electric scooter:
- The voltage needs to be on point.
- Amperage should meet or exceed your scooter's battery appetite.
- The polarity of the connection must be correct.
The essentials of charging
For successful charging and electricity flow, several things are essential.
Firstly, a power source, such as a mains supply, is needed to provide electricity. This electricity makes its journey from the power source to the battery through what we call a conductive path—essentially, this is made up of wires. To effectively carry out the charging process, this pathway needs to be complete and uninterrupted, forming what we call a complete circuit.
A charger is essential in this process. It plays a crucial role in converting AC power (Alternating Current) from the power supply into DC (Direct Current), the type of current that your electronic devices utilize.
But where does all this flowing current go? It requires a destination - typically, a load or resistance, such as a light bulb or motor, which uses the supplied electricity. In the context of charging, specifically, the battery serves as this load.
How electric scooter chargers work?
Chargers are basically AC to DC and voltage converters. Their primary function is to transform the AC power (Alternating Current) from the wall outlet into DC (Direct Current), while simultaneously stepping down the voltage to a level that's appropriate for charging your scooter's battery.
Household AC voltage varies globally, typically ranging from 100V to 240V; for instance, it's about 120V in North America and 220-240V in Europe. However, these voltages are too high for directly charging electric scooters. Therefore, chargers convert this into a more suitable DC range (like 36V, 48V, 60V, 72V) for the battery.
Are electric scooter chargers the same?
No, they are not the same. Each charger can vary in terms of voltage, ampere rating, and even the types of connectors or plugs used. Chargers are specifically tailored to each scooter model. However, there are instances where some chargers might be interchangeable, provided key aspects like voltage, current, polarities, and connectors are the same.
But it's still vital to double-check and confirm that these specifications perfectly align before using a charger interchangeably to prevent any damage to the scooter or battery and to ensure safety during charging.
Navigating Electrical Polarities: Understanding the Basics
Comprehending how positive and negative charges are arranged and interact in an electrical circuit or system is essential since some of the methods we've listed involve connecting the charger's wire to the scooter's battery terminals. A single wrong connection might short out the entire system and destroy the battery.
Fortunately, there's a straightforward labeling and color-coding system in place to assist you in making safe and accurate connections.
Let's start by identifying the polarity of battery terminals and connectors. For batteries, it's simple:
- The Positive terminal is marked by a "+" sign, stamped on the battery casing, or color-coded with red.
- The Negative terminal is marked by a "-" sign, also stamped on the battery casing, or color-coded with black.
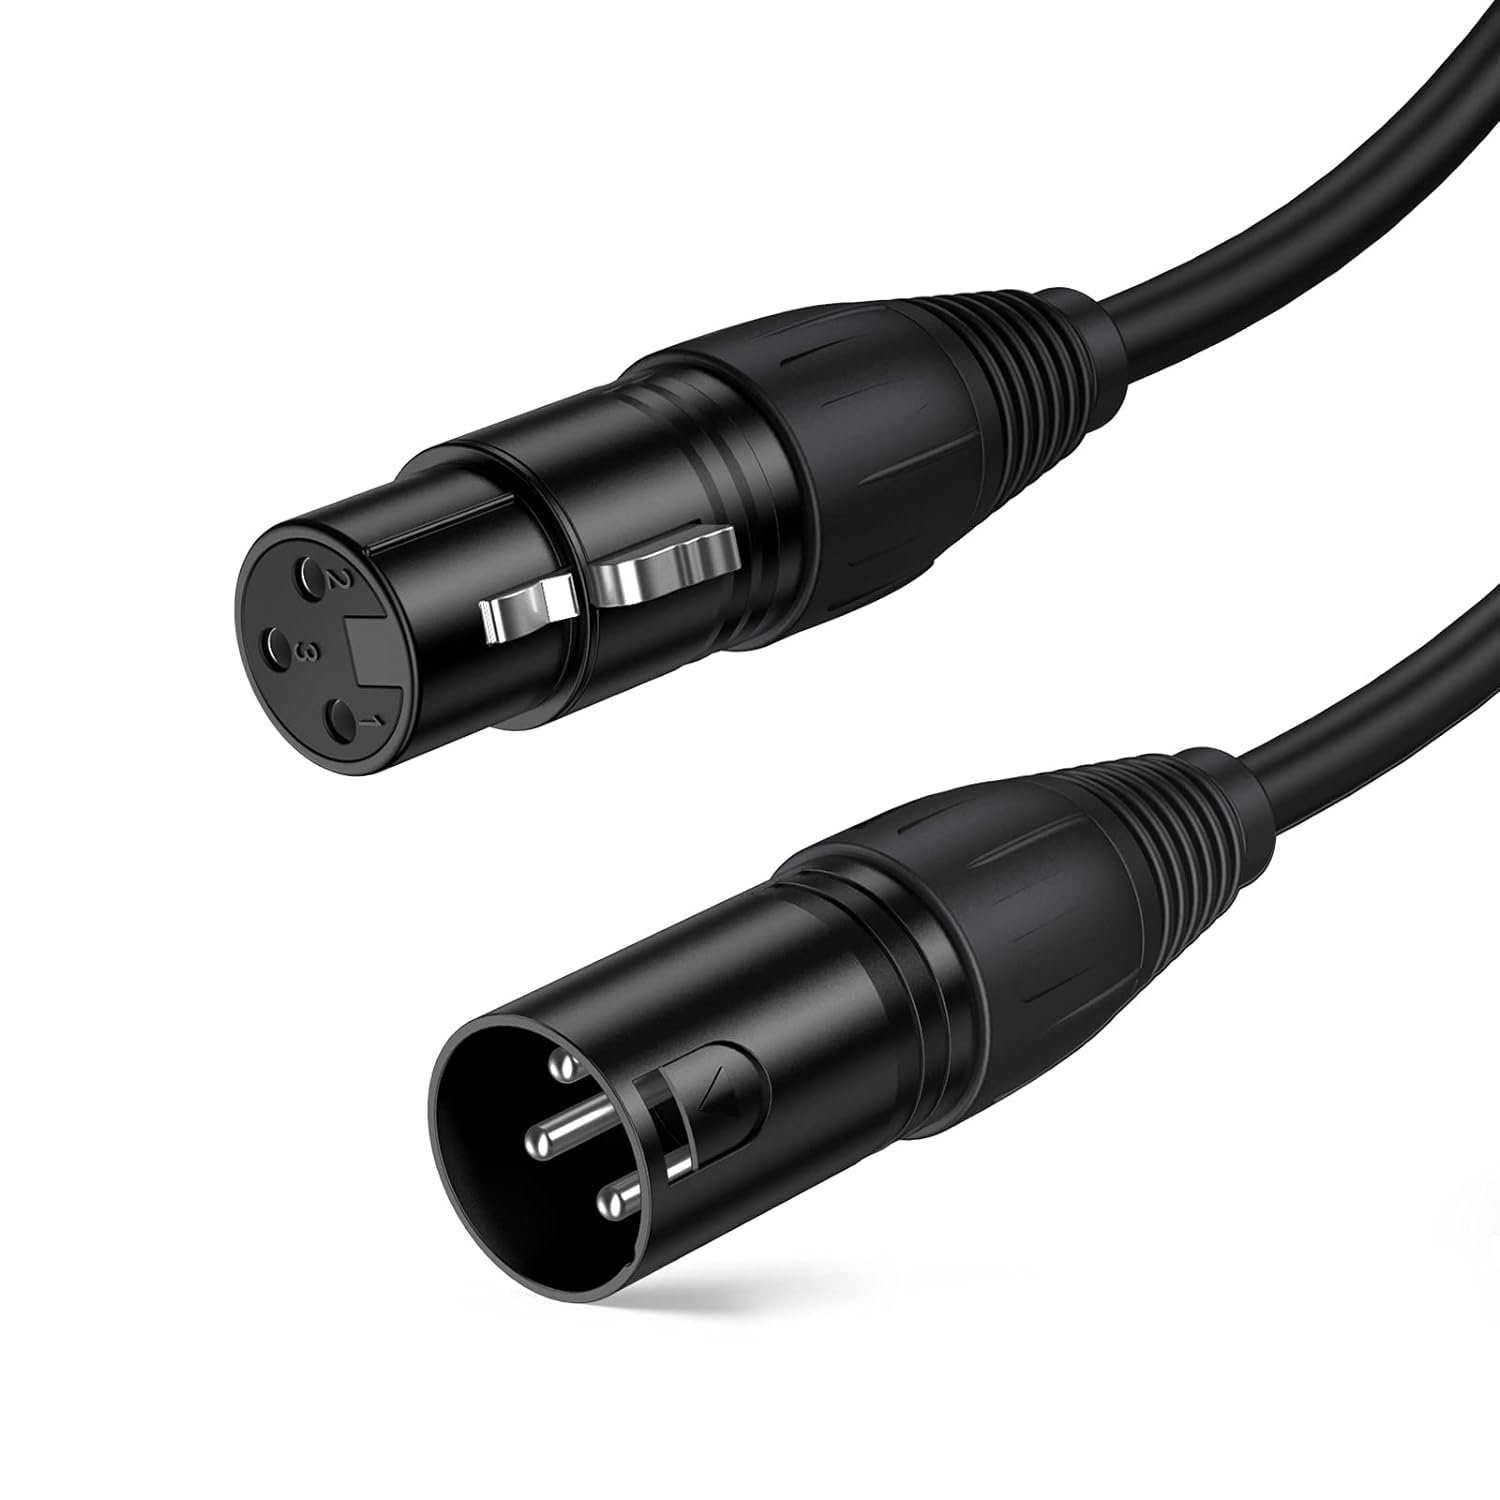
For most modern electric scooters, you'll often come across two types of charger connectors: the DC barrel plug and the XLR three-pin connectors.
In barrel plugs
Has two main parts:
- Center pin (or inner conductor): This is the central metal rod within the barrel plug. The center pin can carry either the positive or the negative voltage, depending on the configuration of the device. In many electric scooter chargers, the center pin is typically positive (+).
- Outer sleeve (or outer conductor): This is the cylindrical shell that's around the center pin, it usually acts as the ground (negative) or return path for the current and is typically connected to the negative terminal of the power supply. The outer sleeve also ensures that the plug makes a secure and stable electrical connection when inserted into a corresponding barrel jack.
Important note: Before plugging in your e-scooter, always check the polarity on barrel plug connectors. Usually, the polarity for each part is clearly marked on the cladding or charger adapter, so don't just guess which is positive or negative. Avoid making assumptions about the center being positive and the outer sleeve negative – it could be vice versa. The key here is ensuring that the polarity matches that of your electrical device and your original charger.
Example: This shows that the center pin is positive and the outer shield is negative
And if you want to be extra sure, go ahead and take a little peek under the cladding. Check out the colors of the cables attached to each part of the connector:
- Positive is usually Red
- Negative is often Black
- Ground might be White or Grey
XLR 3-Pin connector
This connector features three pins:
- Ground pin (mostly pin 1): Typically used for the ground connection, serving as a reference point for the other two pins.
- Positive pin (mostly pin 2): usually carries the positive voltage.
- Negative or neutral pin (mostly pin 3): Often carries the negative voltage or serves as a neutral line.
Most chargers have the pins numbered, making it easy to identify each. You, however, have to confirm the polarity of the pins on the manual or the information sticker on the charger. Note that there’s also no standard color code for the wiring in XLR connectors, but broadly:
- Pin 1 = Shield
- Pin 2 (Positive)= Red
- Pin 3 (Negative)= White or Black
The key takeaway from all this is that when you're setting up your makeshift charging setup, you need to connect the positive from the power source to the positive terminal of the battery and the negative to the negative connection. Remember, swapping these around—connecting positive to negative—is a major mistake you want to avoid.
How to charge an e-scooter without a charger
With a solid grasp on the charging process now under our belts, let's explore some relatively safe methods to charge your battery when the original charger is nowhere to be found.
Before we proceed, a critical reminder: resorting to any kind of makeshift charging method is almost certain to void the warranty of your electric scooter. It's a risk that needs careful consideration, especially if your scooter is still under warranty.
And here's a handy tip: Before you start disconnecting any part of your e-scooter, take a photo. This will serve as a visual guide for reassembling everything correctly. If you can, label each part too.
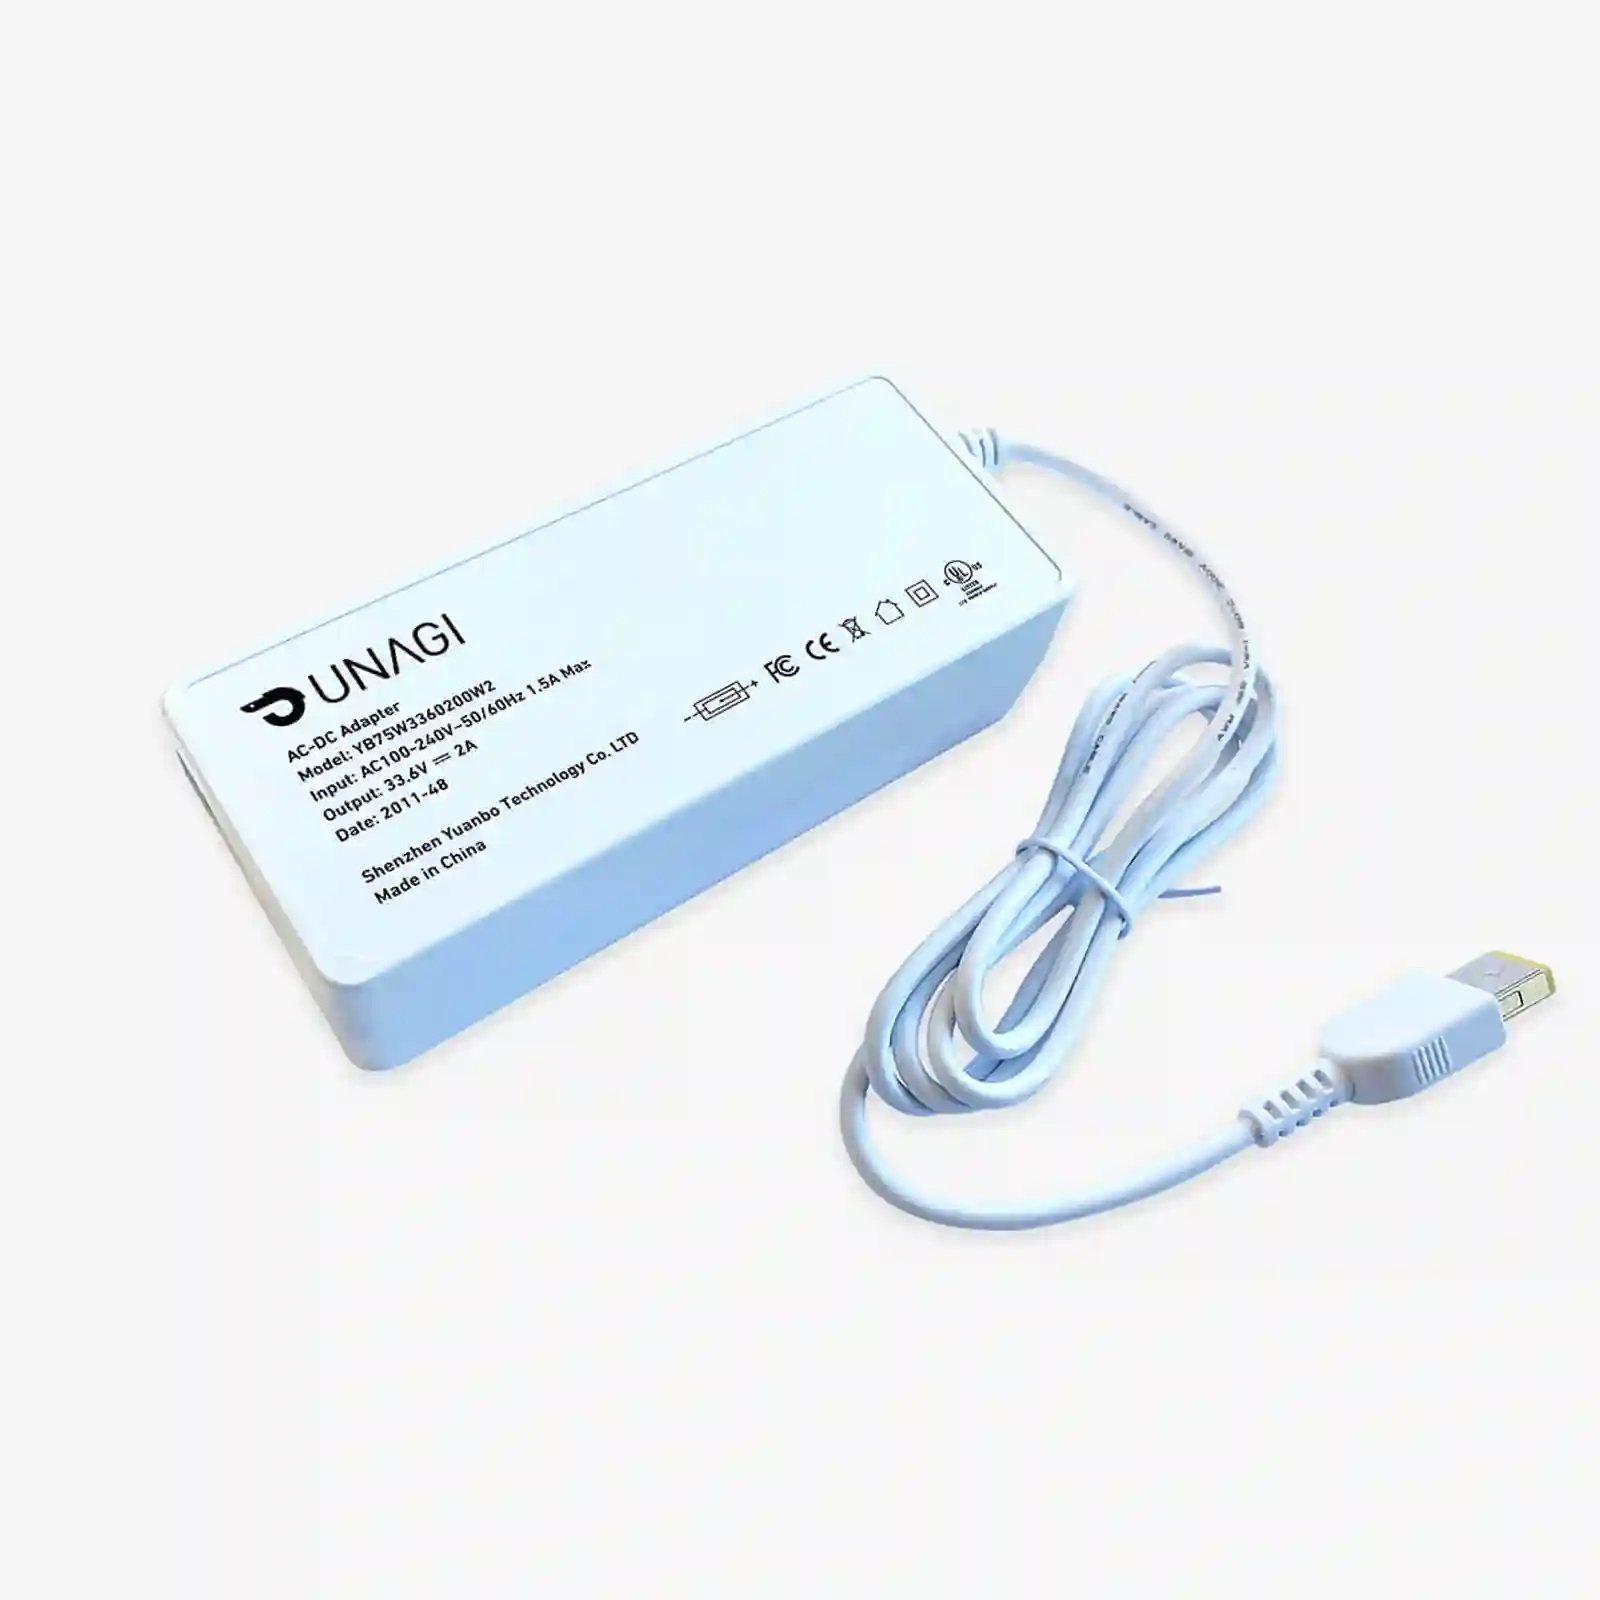
Method 1: Using an alternative charger
If you've lost your electric scooter's original charger, one option is to find a compatible charger designed for other electrical devices that matches the voltage, amperage, and connector type for your electric scooter. These chargers are often readily available:
- Start with a visit to local thrift shops, Goodwill, or second-hand stores. It's not uncommon to stumble upon a charger that fits the bill, often discarded with old electric scooters, hoverboards, e-bikes, or other electric rideables. This is particularly true for scooters with a 36 V battery, as 42 V chargers are quite common, especially if you have a barrel-type charging port.
- Check online marketplaces like Amazon; there are generic electric scooter chargers available for almost every voltage class that may match your e-scooter.
- Consider universal chargers for e-bikes and e-scooters; they come with specified voltage and amperage options, and they also offer different port types connected to the adapter.
Consider laptop chargers for small batteries
Laptop chargers usually sit in the 11V to 20V range, which is low for most lithium-ion batteries in most electric scooters (typically 36V and up). But, if your scooter sports a smaller 12V battery like those found in kids' scooters or models running on lead-acid batteries, you might just match a laptop charger, particularly if they have a barrel-type charging setup.
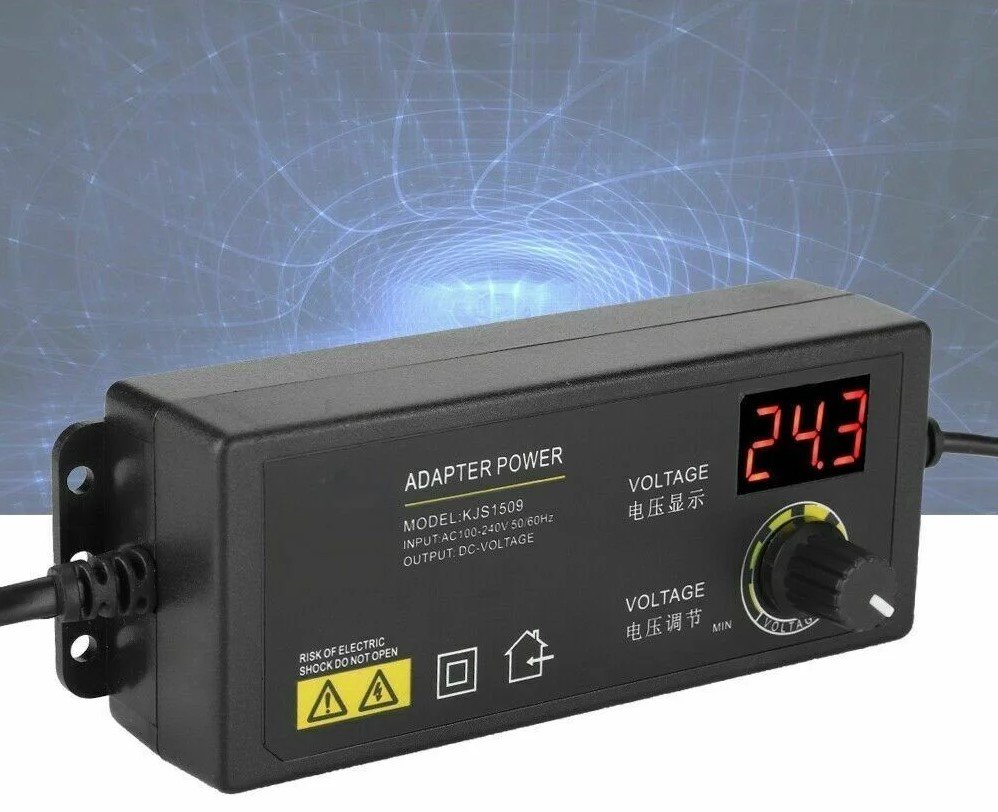
Adjustable AC/DC switching power adapter
You can also look for an adjustable AC/DC switching power adapter that allows you to set the output voltage of the charger to match that of the battery you are charging. These adapters have an operational range of, say, 3-36V, so you'd need one where the maximum output matches or exceeds your battery's maximum voltage. Many of these chargers come with multiple connector options, so you can choose one that matches your electric scooter's DC port.
Method 2: Repurpose your non-functional charger
If you have a non-functional charger, you can make use of parts of it to create a new charger. In this method, you mainly need the charging connector. Here's how:
1. Find a suitable replacement charger
- Look for any charging adapter that matches your battery's voltage, regardless of the connector type.
2. Salvage the old charger connector
- Cut the old non-functioning charger's connector, leaving about 10-15 cm of wire attached.
3. Prepare for splicing
- Cut off the connector from the new charger.
- Slide a shrink tube onto the wire of the old charger connector or the new charger’s cable (to be used later).
4. Splicing the wires
- Strip about 3 cm of insulation from the wires of both the old charging connector and the new charger's cable to expose the wires underneath
- Follow the polarity rules: connect the positive wire of the old connector to the positive wire of the new charger's cable, the negative wire of the old connector to the negative wire of the new charger's cable, and do the same for the grounding wires. Positive wires are typically red, while negative wires are usually black.
5. Insulate the connections
- Wrap each joined wire pair individually with electrical tape to ensure the exposed joined wires do not come into contact with each other, as they could short-circuit if power is running through them during charging.
6. Testing the connection
- To ensure the connection is properly made, first, plug the charger into a wall outlet and switch it on, but do not connect it to the scooter yet. This allows you to test the connection. Watch for any sparks or abnormal behavior. If you notice any issues, it's important to recheck your connections.
7. Connect to the scooter
- Once confirmed safe, connect the charger to the e-scooter.
- Check if the scooter is charging properly.
8. Finalizing the connection
- If everything works well, slide the shrink tube over the joint and apply heat to secure it.
Additional tips:
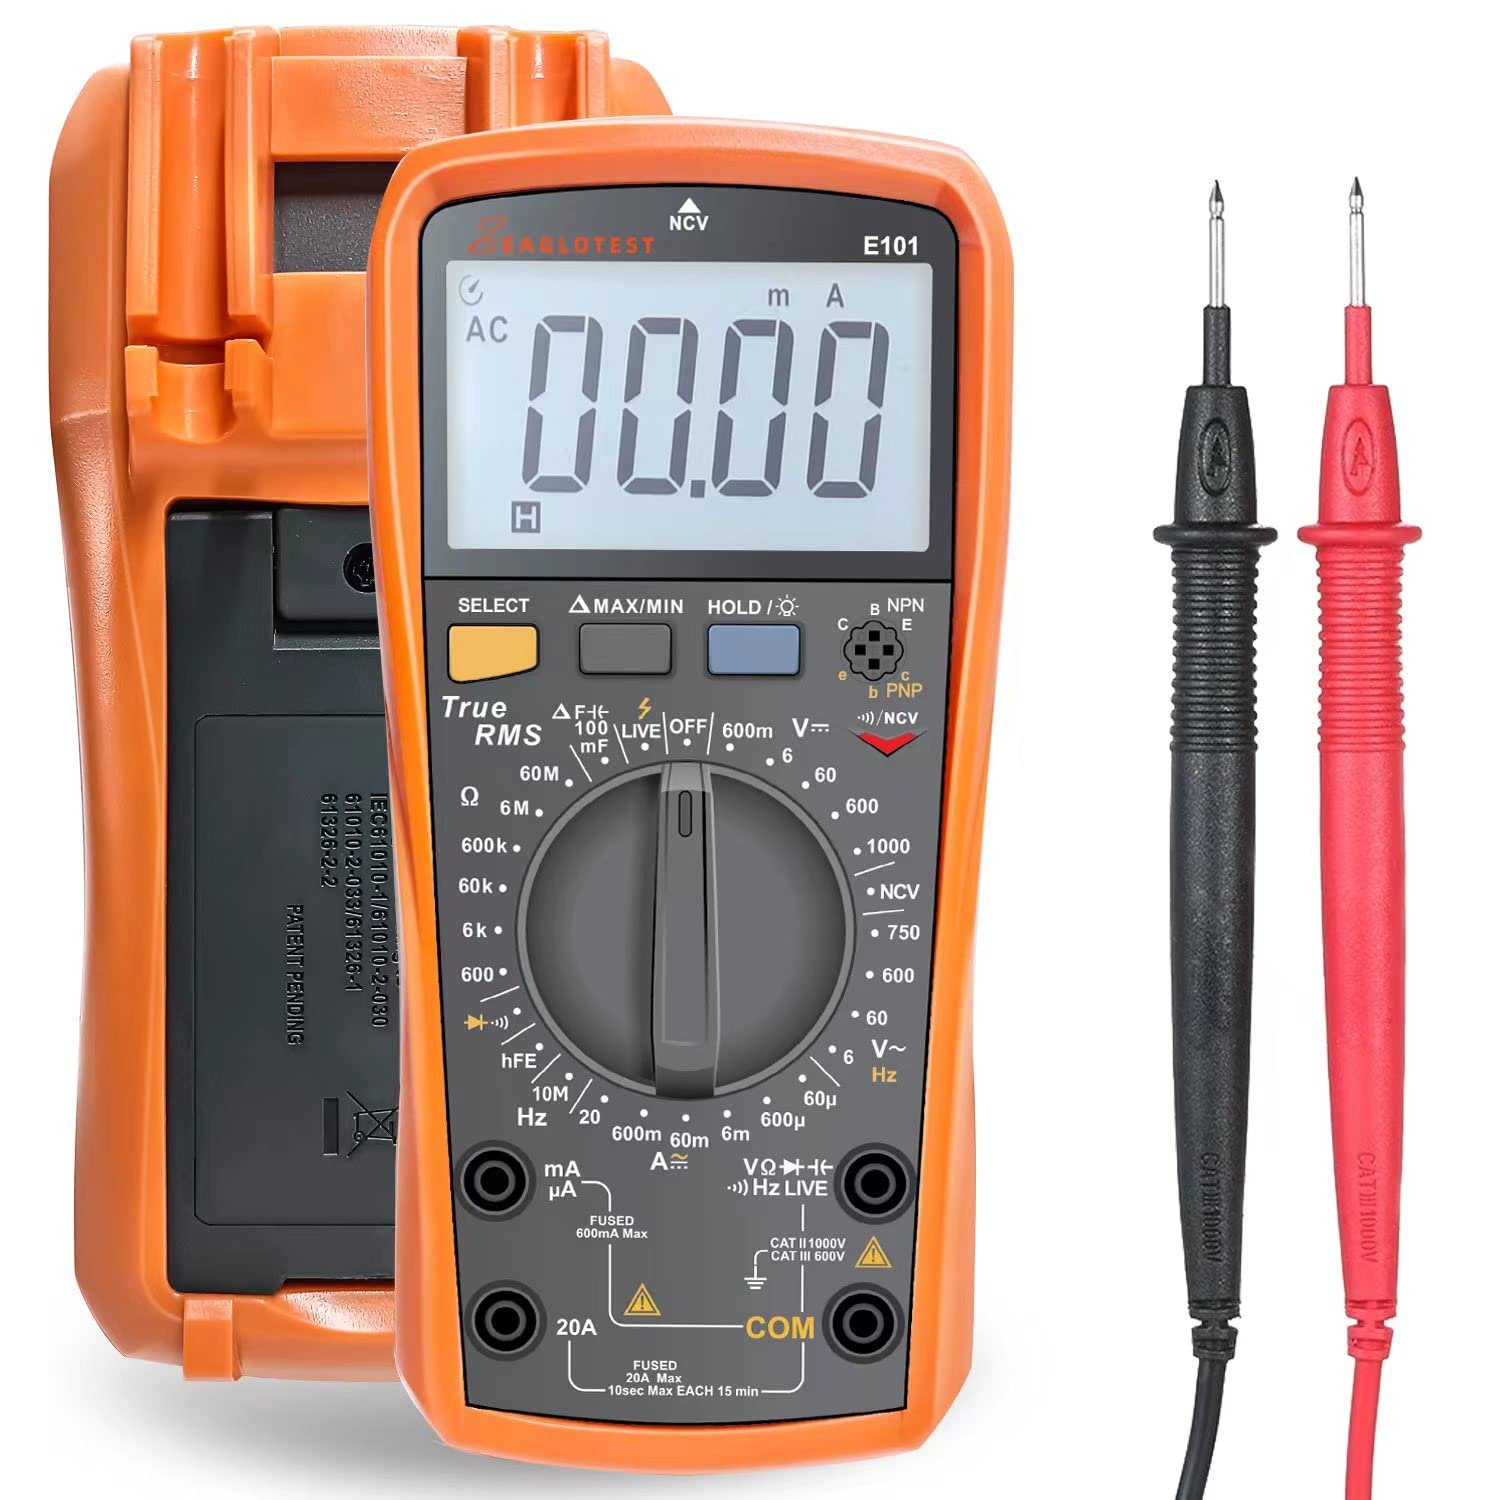
If you have trouble determining the polarity of the power supply cable, especially if the wires have similar colors, you can use a voltmeter to determine the positive and negative sides of the power supply. Here's a short video to show you how to determine the polarity using a voltmeter: How to quickly determine the polarity of your DC power supply with a multimeter.
If you don't have the original charger's connector, determine the type you need for the connection, and you can easily find a replacement in most electrical shops or online marketplaces like Amazon, as long as you have the right measurements or are sure about the exact connector you need. If you're unsure, you can take your electric scooter to an electrical shop and try out different connectors to ensure they fit.
- For electric scooters with XLR 3-pin charging ports, you can attach the charging cable's wires to bullet terminals. The choice between female or male bullet terminals depends on the type of charging port on your e-scooter. If the charging port is male, then use female bullet terminals, and vice versa. Then, connect them to the charging port while adhering to the rules of polarity (match positive to positive and negative to negative).
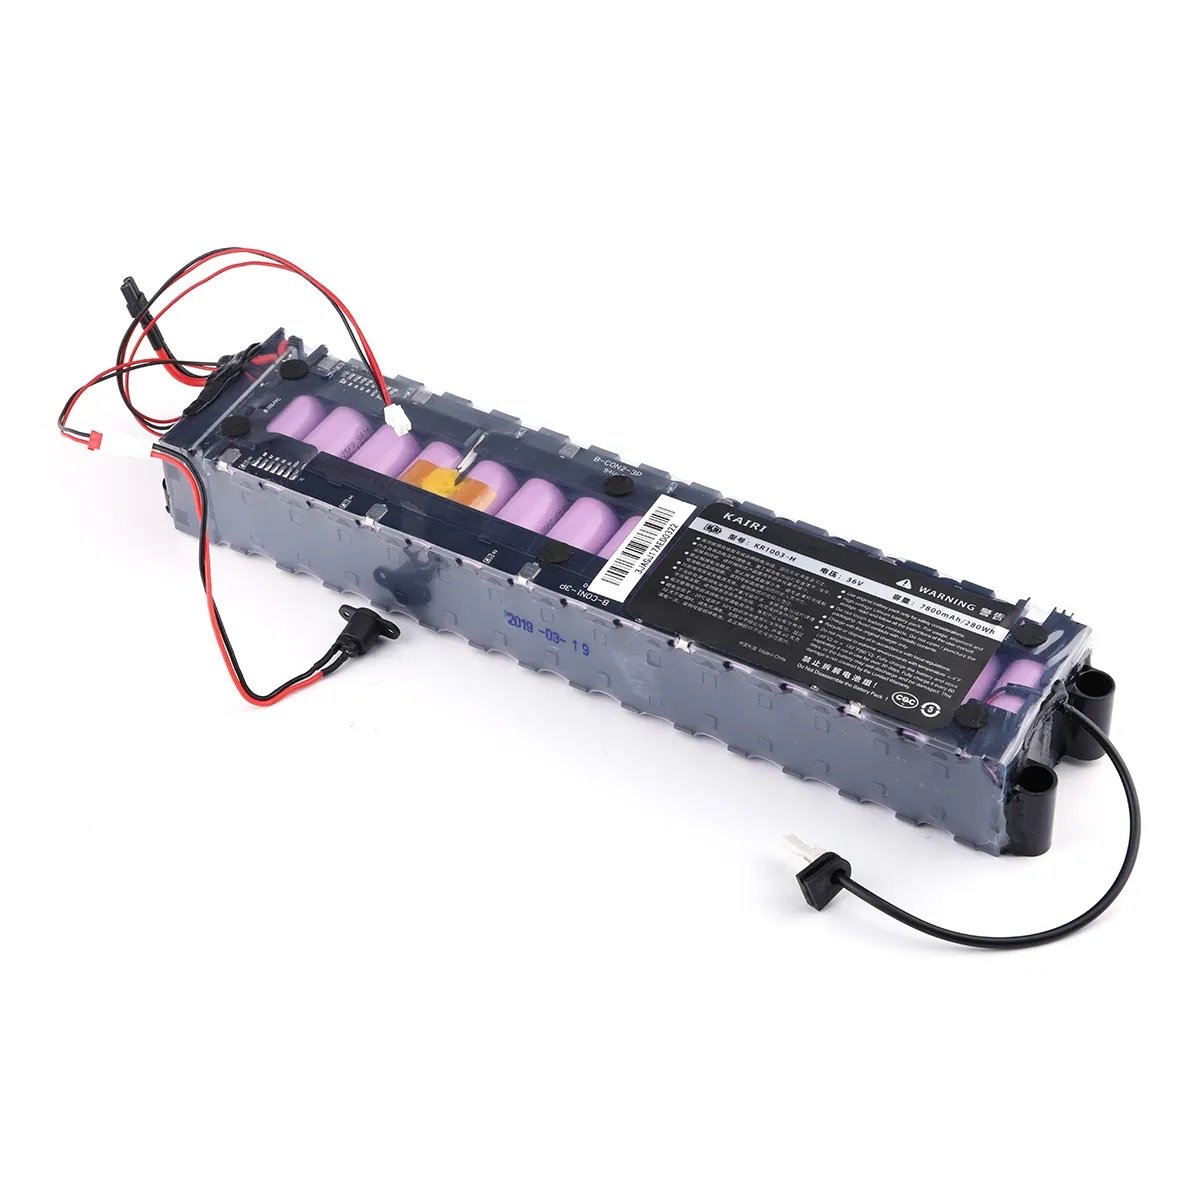
Direct charging the battery
If you're unable to charge your electric scooter through the charging port, direct battery charging is an alternative. However, it's not the most advisable method as it involves a bit of complexity and tediousness. This process requires connecting the charging cables directly to the battery, which necessitates opening up the scooter to access and disconnect the battery.
Let's start with the basic steps that you will probably have to do in this procedure.
Accessing the battery
- Firstly, make sure the scooter is turned off.
- The location of the battery varies; it's often under the deck but can sometimes be in the stem. Those located on the stem are usually removable batteries and are typically easier to remove. If it's under the deck, you may need to peel back some of the grip material to uncover the screws.
- Unscrew the shell of the scooter, and keep the screws in a container for safekeeping.
- It's helpful to take a clear photo of the internal setup for reference when reassembling. Pay special attention to the wire connections and consider labeling them.
Disconnecting the battery
- Always disconnect the negative terminal first, followed by the positive, to minimize the risk of short circuits.
- This order is reversed when reconnecting the battery (connect the positive terminal first, then the negative).
- If there's any dirt or corrosion on the terminals, clean them with a wire brush.
Now with the battery out, you can proceed to charge the battery using:
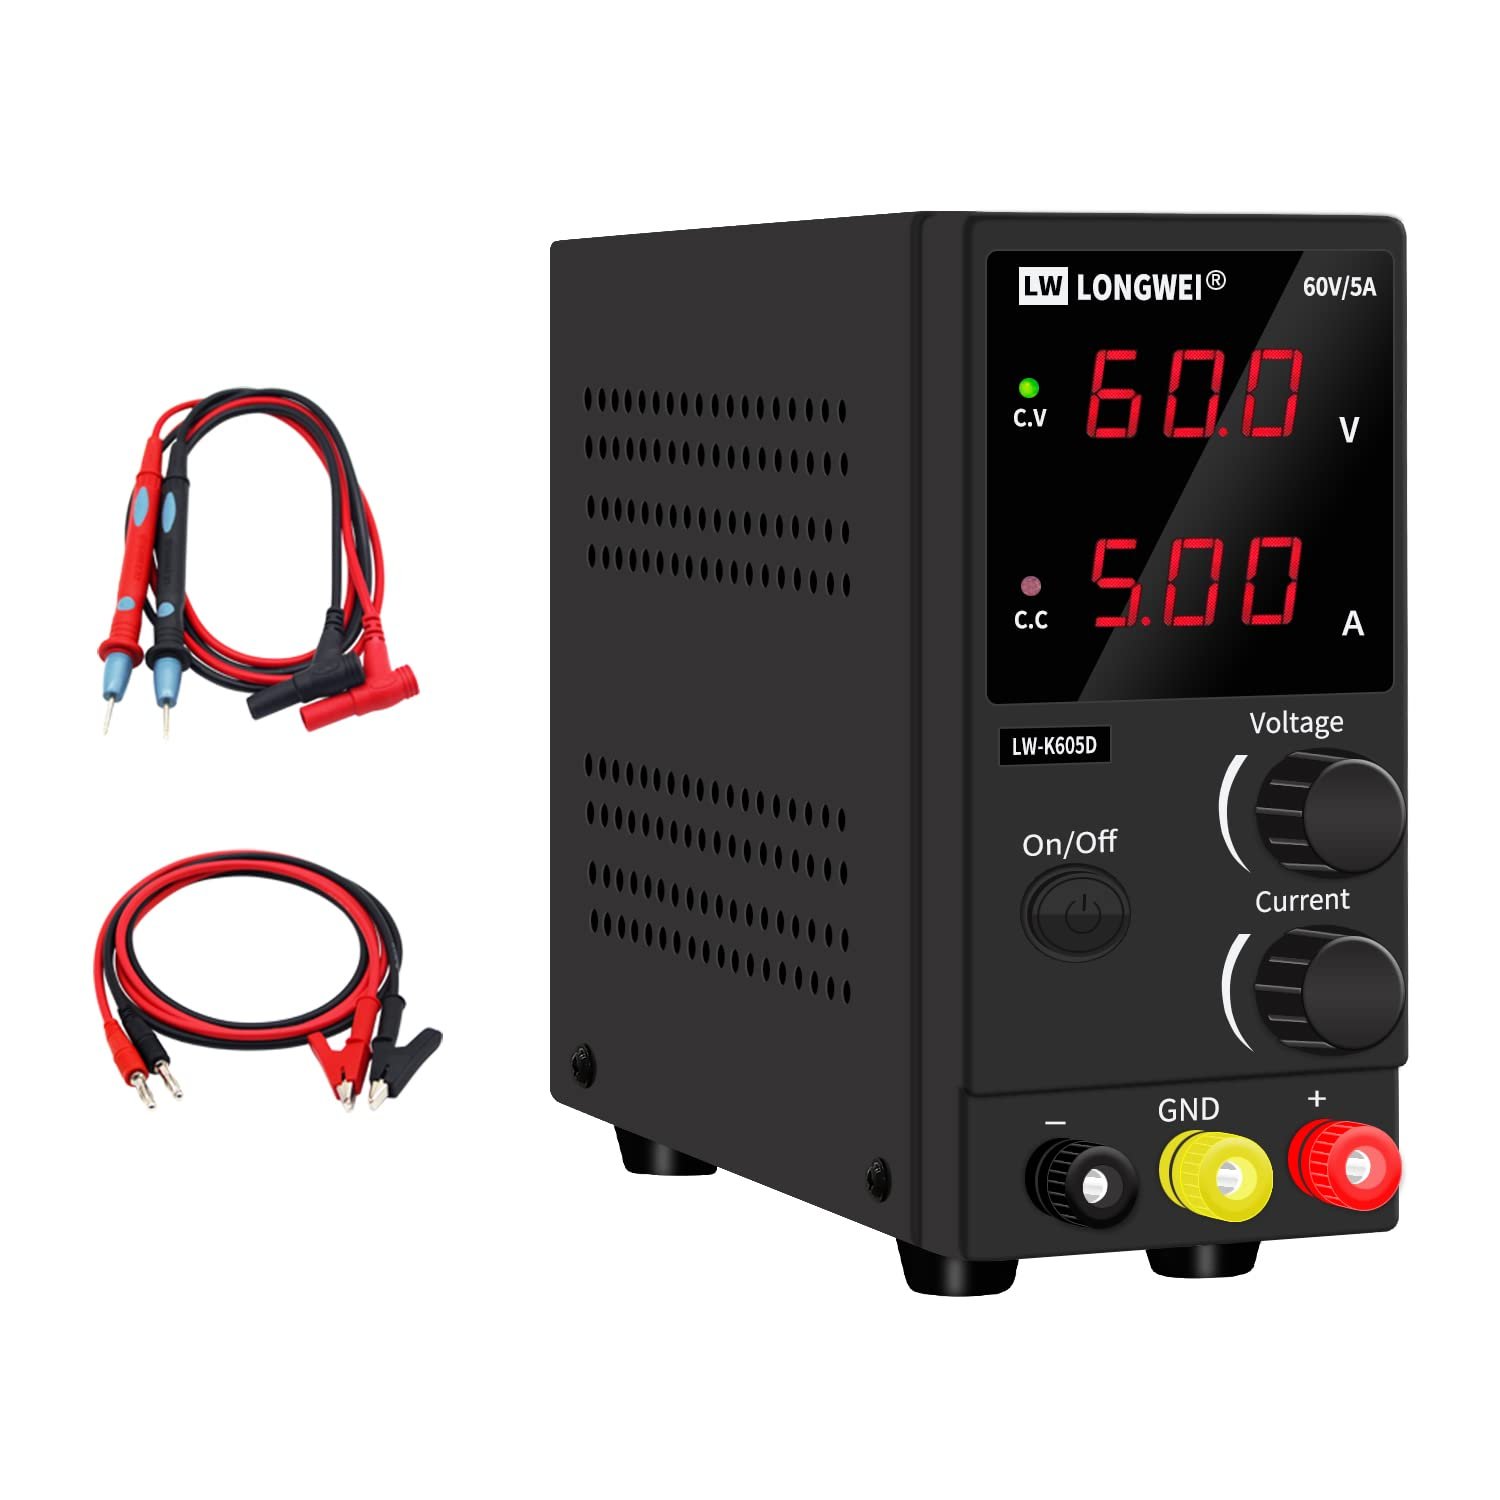
An adjustable DC power supply (bench power supply)
When using an adjustable DC power supply (bench power supply), it's good practice to set all your settings before connecting it to the battery.
1. Set up the power supply and maximum voltage
- Turn on the DC power supply.
- Set the correct voltage as per the battery specification. This should be done before connecting any load (battery).
- Ensure the maximum voltage is set correctly This will ensure that the battery will not charge above that voltage thus avoiding overcharging.
Most bench power supplies come equipped with an LCD screen and intuitive controls, making it straightforward to adjust these settings
2. Set the Maximum amperage
- After setting the voltage, introduce a load to set the ceiling for the amperage. This can be done by temporarily connecting the two connectors of the bench power supply.
- Set the desired current for charging, keeping in mind that opting for a lower current is better for the battery's health as it puts less strain on the battery. However, if needed, you can increase the current for faster charging. It's important, though, to always stay within the battery's specified limit (Min and Max).
- Detach the cables. The current reading will drop to zero, but the maximum current setting has been saved to the memory.
3. Avoid adjusting knobs after setting
- Once you have set the desired parameters on your power supply, it's crucial to avoid adjusting the knobs. Changing these settings can unknowingly alter the limits you've established, which might not be immediately apparent on the display. For instance, after removing the load, the current amperage might show as 0.00. If you then adjust the current dial, the figure on the screen may not change (remain 0.00), leading you to believe that no adjustment is taking place. However, these changes are happening in the background, and they will become evident once a load (battery) is reconnected. At that point, you'll notice that the current has increased or decreased based on the adjustments made, even though it wasn't initially displayed on the screen.
4. Prepare the connections
- The power supply will have a black (negative) and a red (positive) cable.
- Connect the black cable from the DC power supply, attached to the port marked with a minus sign (-), to the negative terminal of the battery. Then, connect the red cable, linked to the port marked with a plus sign (+) on the DC power supply, to the positive terminal of the battery.
- Ensure firm connections to prevent overheating. Secure with tape if necessary.
5. Monitor the charging process
- After connecting the battery to the DC power supply, the voltage reading will decrease to match the battery's current voltage. Simultaneously, the current reading will show the maximum amperage you previously set.
- As the battery charges, the current will start dropping, and the voltage will rise, indicating charging progress. The current will eventually drop close to zero when fully charged, and the voltage displayed will be the one you initially set (the battery’s full charge). You can use a voltmeter to confirm the battery's voltage.
Note: When you connect the battery and see the voltage reading drop, you might be tempted to adjust the voltage back to the figure you had set. However, it's crucial not to adjust the voltage dial after the battery is connected. Doing so doesn't change the voltage displayed on the screen, but it silently increases or decreases the maximum voltage you had previously set . The true impact of these adjustments only becomes apparent once the battery is removed.
- Throughout the process, make sure to regularly check every 30 to 60 minutes to ensure everything is proceeding as expected, paying particular attention to potential issues like battery swelling or overheating. Also, given the extended duration of the process, it's advisable to periodically turn off the system to prevent overworking it.
6. Finishing the charging process
- Once fully charged, turn off the DC power supply and disconnect the wires.
- Allow the battery to cool off before handling.
7. Reassemble the Scooter
- Finally, place the battery back in the scooter, and carefully reconnect the wires ensuring correct polarity. Use the labels or photos you made earlier as a reference to guide this process.
- Test the scooter first before reassembling the deck
- Screw the shell back and test the scooter again to see if it operates correctly.
Conclusion: How to charge electric scooter without charger
Every electric scooter requires a specific charger tailored to its battery, ensuring the correct voltage, current, and polarity. Lost your original charger? The first move should be to get a replacement directly from the manufacturer or dealer. These usually come under $60, which is a small price for peace of mind. But if the manufacturer's out of stock, you can check Amazon for some generic options. They may not be top-of-the-line like the original, but they're definitely a safer bet than rigging up something on your own.
Using an incorrect charger can be highly problematic. Even a single mismatched parameter can result in severe consequences, from a fried system and a ruined battery or worse, setting the stage for a fireworks show you didn't plan.
It's also worth noting while the methods we've discussed are relatively safe for charging, it's important to remember that using non-manufacturer chargers will immediately void your scooter's warranty. This is a situation you want to avoid, especially if your scooter is new.
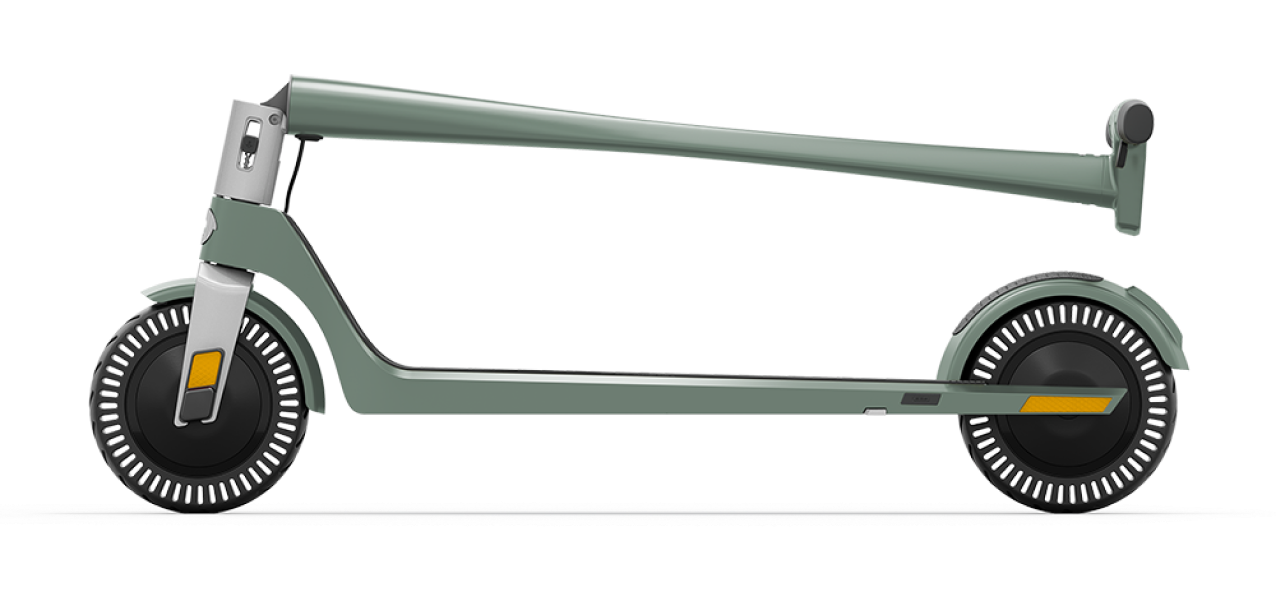
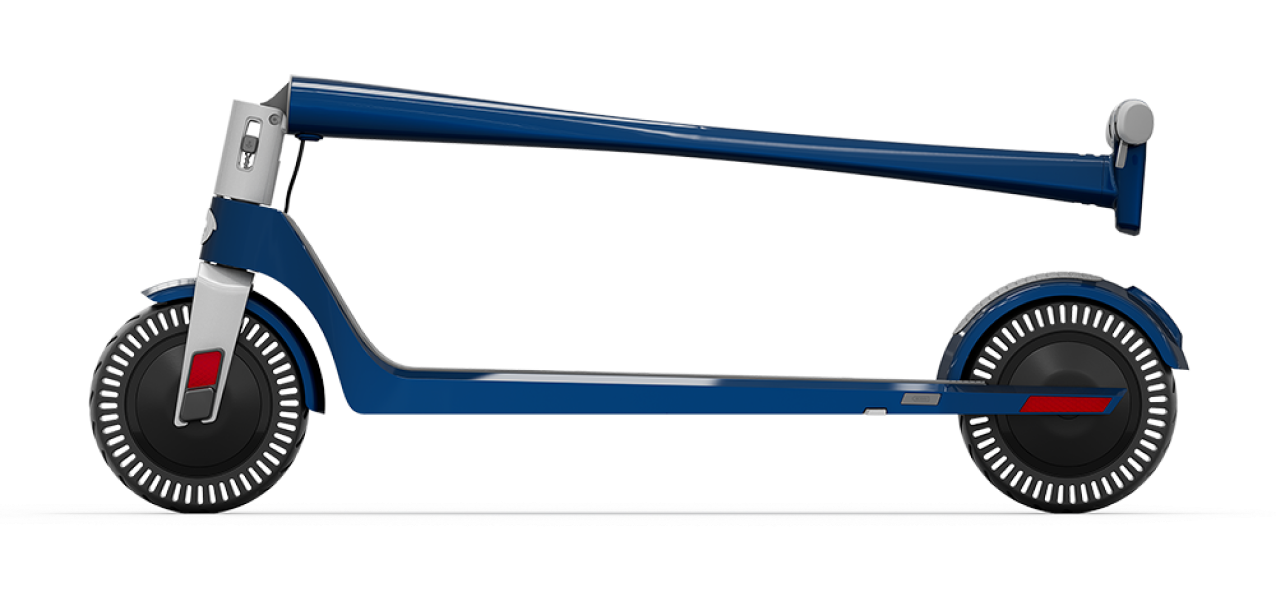
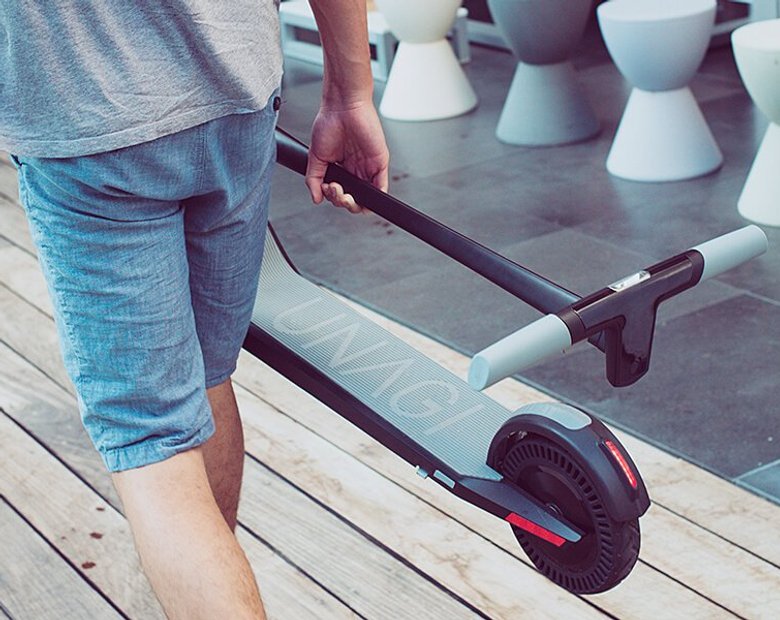
So, if you're in a situation where you're waiting on a replacement charger, or it's just not available yet, think twice before using a stop-gap charger. It's not worth risking your warranty. A neat alternative? Rent an electric scooter for a while. Unagi's subscription program lets you hop on a Unagi Model One for as low as $39. It's a scooter that stands out with its top-notch build, feather-light design, and performance that packs a punch — boasting a 20 mph speed and a 12-mile range. Plus, it offers the convenience of mobile connectivity for easy customization.
This subscription comes with Netflix-style flexibility-you're not locked into anything long-term and can change or cancel whenever. Unaig also throws in three-day express delivery at no extra cost. And if something goes wrong, they've got you covered with a replacement scooter, pronto, minimizing any downtime. They even throw in theft insurance, just in case.
Choosing this option can effectively cover your needs while you wait for your scooter's charger, ensuring you don’t compromise your warranty or safety.